In the vast landscape of the internet, maintaining online privacy and security is paramount. One effective way to achieve this is by using ProxyLink on BitBrowser. This article will guide you through the process of setting up ProxyLink on BitBrowser, ensuring a seamless and secure online experience.
What is BitBrowser?
BitBrowser is an innovative antidetect browser designed to streamline the management of multiple accounts seamlessly. In the realm of online activities, users often find themselves juggling various accounts, be it for social media, email, or other platforms. BitBrowser emerges as a solution to the challenges posed by conventional browsers when it comes to maintaining distinct online identities.
What is ProxyLink?
ProxyLink serves as a protective barrier between your device and the internet, acting as an intermediary for online requests. Its primary purpose is to enhance security and privacy by masking your real IP address.
Step-by-Step Guide: Setting up ProxyLink on BitBrowser
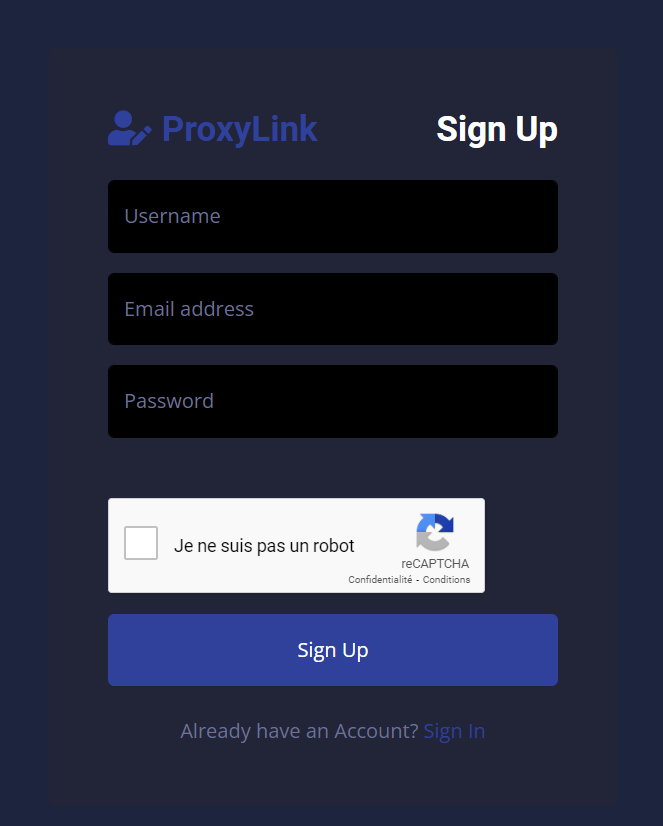
Step 1: Sign Up for ProxyLink
Start the process by registering for a ProxyLink account. Explore our website and choose a plan that suits your specific needs.
Step 2: Generate Your Proxy
1. Create your proxies by accessing the « Proxy Generator » category. Here, you have the flexibility to select the country, choose between sticky or rotating options, specify the format, and determine the quantity.
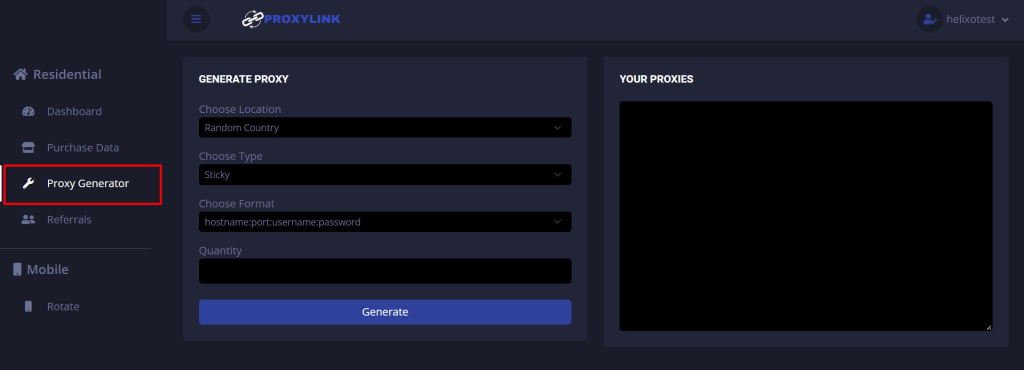
2. Click the « Generate » button to acquire your proxies

Step 3: Download and Install BitBrowser:
Visit the official BitBrowser website and download the latest version.
Step 4: BitBrowser Proxy Settings
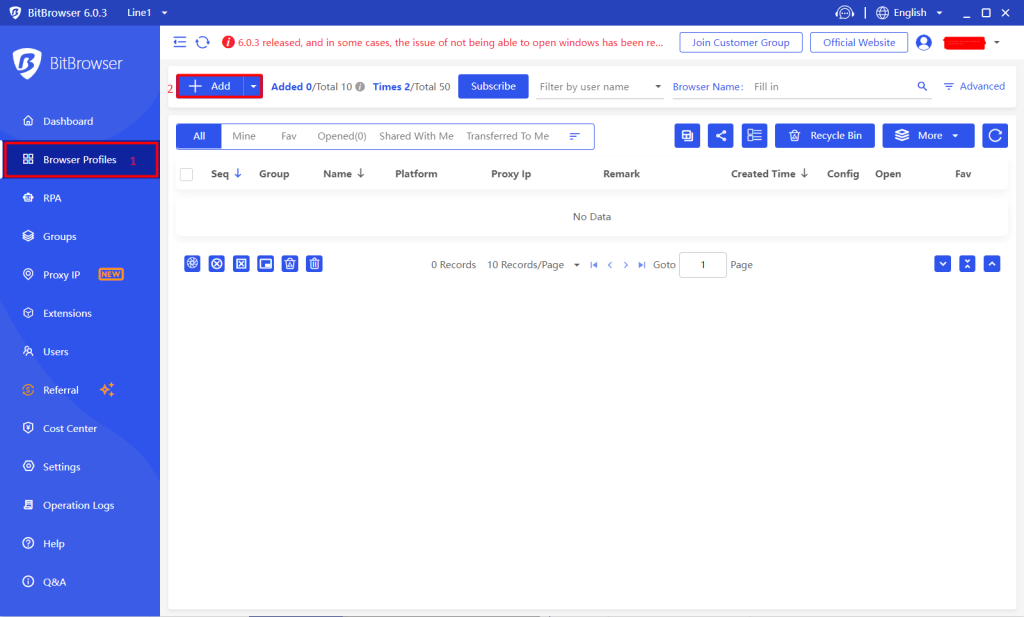
1. Navigate to « Browser Profiles » and choose the option « Add. »
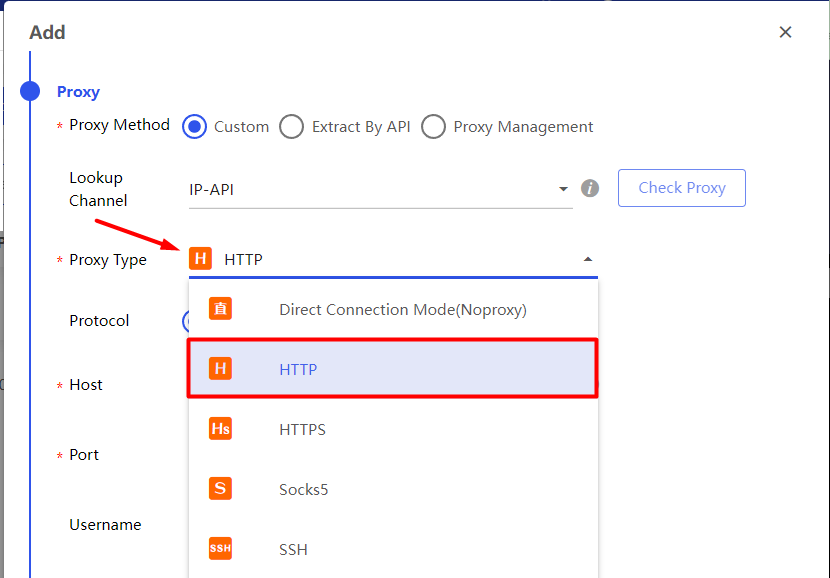
2. Select the proxy type, specifically HTTP for ProxyLink.
3. Input the proxy you’ve generated.
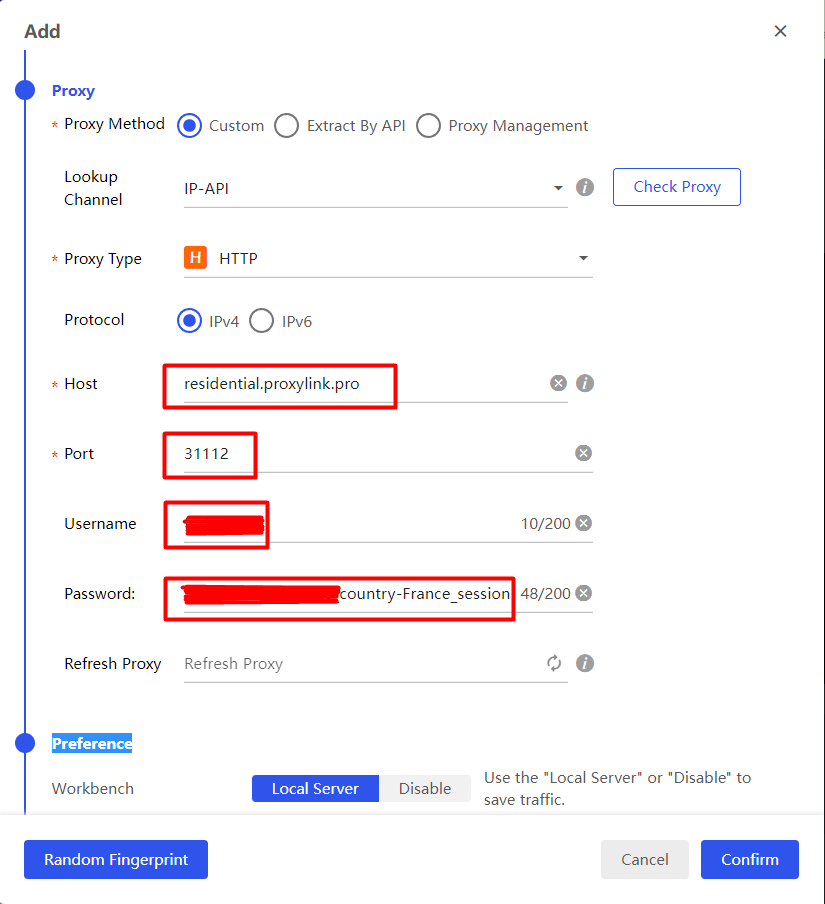
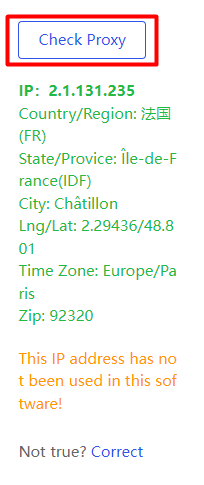
4. Click on « Check Proxy » to verify its proper functionality.